• Home
  • About Me
  • Services and Offerings
  • Contact Me
  • Social
    • YouTube
    • Instagram
    • Facebook

Dave Rothrock's The Ranting Angler:

Old Musty Opinions, Observations and Such.

                                                                    A FLY TYERS' REUNION 


It's always good to get together with those who share a common interest.  In this regard today's fly-tyers are no different.  Whether its demo tying at a T. U. or FFI meeting or at a show we're always eager to mingle with other tyers.  It's so much of what we like to do.  Sharing experiences relating to on the stream or at the vise is commonplace.  And, it just plain adds to the appeal and enjoyment of what many refer to as "the craft."


My earliest efforts at tying a fly takes me back to another time:  a time when those who tied flies made it a point to NOT share.  Yes, there were those few who had begun to break through the membrane of secrecy that had surrounded this craft but they were still seen as the exception rather than the norm.  Fortunately, it didn't take long for this to change.


Today, it's a matter of "ask and it shall be given unto you" when it comes to information about tying a fly.  Secrets only remain so as long as the tyer hasn't yet had the opportunity to share a new technique or a new variation of an old one.  I'm one of those who believe there's VERY little under the sun that's actually new or that new isn't always better.  

For a long time one of the few ways to expose one's self to a variety of tying techniques was when the local Trout Unlimited chapter had some of their members tying before the business meeting.  I was fortunate to find a few guys who wanted to get together through the winter to tie.  We'd rotate hosting the group at each other's house from week to week.  Never any set patterns to tie, just tie what we'd want.  Of course, there was the food.  Goodies galore!  Those were good times.


Today we have the Fly Fishing Show circuit with the tying celebrities tying their most notables and then there's the grandest of them all, the Fly-Tyer's Symposium.  For many years I was one of those tyers and I can tell you first hand the admission to these shows is more than worth it just to be able to watch and learn from the vast volume of talent there.  Yeah, I know.  What about YouTube?  Sorry, but I just haven't been able to get any of those tyers to pay attention to me when I ask a question.  They simply go on as if I'm not even there.  Hrumpf!


While I may not get to fellowship with other tyers as I did in the past (I'll never admit I miss it just slightly) there is one event that provides us an opportunity to spend a little time together.  You see, Chuck Furimsky and his son Ben are flat out O.K.  It's because of Chuck's generosity and desire to express their thanks to the tyers that we have the Fly-Tyers' Reunion weekend.  This event is hosted by Chuck at Seven Springs Mountain Resort at Highlands Sporting Clays.  It was held this year (2022) on April 28.  I can safely say a good time was had by all.  I absolutely must give a giant shout-out to Chuck and Ben Furimsky for their including so many talented tyers in their shows.  The biggest THANK YOU to both of them.


On a sad note the fly-tying community lost one of our finest this year.  Randy Buchanan was a constant at the shows here in the east.  You could always count on Randy tying his signature stonefly nymphs and other assorted patterns using Larva Lace.  I counted Randy as a friend and now-and-then even a fishing companion.  I was hit hard by his passing;  yet, it's something we'll all have to face at some point as an inevitability.  For me, it is so critical to plan for what comes after.


And, who knows.  You may see me sitting behind a vise one day at one of the shows.  It's not beyond the realm of possiblity, you know... 


 DAVE ROTHROCK'S APPROACH TO FISHING NYMPHS PART 5:  STRATEGY  WITH A SPRINKLING OF TECHNIQUE

Egads, I can't believe there's been this much time passed since my last piece.  So much for getting out on the water and actually fishing - and some serious procrastination - getting in the way of my writing!  And, yes, I've had some really good days on the stream when the water was cool!


Now that I've covered most of what goes into my nymphing game in the previous segments it's time to apply it to real world fishing.  And, just maybe, it starts where you may not expect it.

First things first and that has me make sure that before I leave the house I have everything I may need to meet the conditions I'll encounter.  Yeah, I usually pack a few rods and I always take both reels.  It's not unusual for me to put whichever reel I won't be using to start in a vest pocket.  If conditions change while I'm on the water I can always switch if I so choose.  Versatility, remember!  

When I arrive at the stream the first order is deciding what rig or system I'll fish.  What factors play in the decision making process?  The most important is wind.  I can get by with a sighter system if there's only a light breeze.  It doesn't take much wind to push on my exposed leader to the point where it can move my fly/flies right out of the drift lane.  Too, wind  can inhibit my ability to detect any abnormality in drift which includes a trout's take. This is especially true if I'm going to be fishing fairly shallow water and using little weight.  

Another factor I consider is whether I can cover most of the water with short casts and reposition with minimal difficulty as I move upstream.  We all know that presenting flies with a sighter system is a short line game.  There's this "thing" I call my personal mobility factor.  I'm old and I'm also a very conservative wader.  Actually, I've always been a very conservative wader.  You could even say I've been a wuss for wading for years.  I'm not afraid to admit it.  If I get into the water and can't move around easily - and safely - the short game won't serve me well.

So, what are some of the benefits of fishing a sighter system?  First, there are only 2 anchor control points:  rod tip and weight.  You may notice I didn't say flies.  I'll get to this shortly.  Too, I can control angle of drift in the water column which allows me to vary slightly the level at which my upper fly is moving.  Combine this with varying the distance between my bottom and top flies and I've got even more with which to work. ,Also with the exception of a New Zealand strike indicator I don't have the splash of an indicator landing on the stream surface.  Some anglers are overly concerned with an indicator spooking trout and this just isn't always the case;  however, using a sighter can give some of us a little more peace of mind.  Finally, there may be a little more sensitivity associated with a sighter system.  After all, a sighter is only an indicator.  This all adds up to having a bit more control when presenting and drifting nymphs using a sighter system.  As much as I don't like to admit it this is my preferred nymphing system.


So, what about indicators?  Well, first off, with an indicator system we have 3 anchor control points:  rod tip, indicator and weight.  Some fly fishers feel there is loss of control with the indicator - and, to a limited degree, it's true.  However, I believe I can control (to a point) from rod tip to indicator and I can plan for acceptable drift from indicator to weight.  The only thing I can't control is the angle of drift from indicator to weight and I can live with that.  

An indicator riding on the stream surface is gripped by the surface film.  There have been times when I've used a thingamabobber and when I've lifted the indicator off the surface there was resistance - actually, a lot of resistance.  The surface film didn't want to give it up.  Now think about that pesky wind trying to push on line or leader.  The surface film's grip on the indicator will hold it in place and I can get the drift I need.  As for the thingamabobber...well, sometimes I felt it was "stuck" in the surface film to the point that it impeded my ability to set the hook quickly.  Good enough reason for me not to use them.


What about fly selection?  For me it's something I don't do until I'm at the water.  I'm not one to choose my flies and tie them to my tippet before I make my way to the stream.  Since I'm going to use flies to suggest the naturals prevalent at the time I don't want to be surprised to see something going on I didn't expect.  Also, Picking up some stream rocks and examining the critters clinging to them can give me a handle on what the trout may be feeding on in real time.  Besides, I'm intrugued by bugs!


Once I've determined what I'm going to use fly-wise it's time to take a minute to check out the water to determine my strategy from presentation through the drift.    Always cover the water nearest to you and that means don't put yourself in the water you should fish first.  There needs to be a method to our casting madness.  I'm always looking for pockets, depressions, deeper cuts in the channel's flow.  Some of the indicators are obvious, others are more subtle.  It can be a matter of seeing the substrate clearly in more shallow areas.  In other areas it's a matter of recognizing the change in the color of the flow indicating increased depth. 

Identifying changes in current speed is a key factor in determining where to drift my nymphs.  Some current seams are obvious and others are subtle.  Substrate and stream bank are two of the major players in contributing direction of flow as well as speed.  Keep in mind, too, that it's not only surface flow that changes it's also subsurface.  And we'd be absolutely, majorly (is this a legitimate word?) surprised to see how crazy different subsurface currents can be in contrast to what we see on the surface.

Current speed and depth are the critical factors in determining how much weight to use.  Since I use unweighted flies most of the time I have a pretty good idea of how much weight I need to get my flies down where I want them.  It's quick and easy for me to change weight as depth and flow rates vary - and vary they do!

When we consider the water to be fished we need to recognize we fish from the rod tip.  For me that means I can plan on effectively fishing at about 12 feet (roughly the length of my rod and outstreached arm) beyond - that's directly across the stream - from where I'm standing before I find myself casting across multiple currents.  And this is something I do my best to avoid.  Why?  Because I do not want my leader crossing multiple subsurface currents.  Let's keep in mind fishing a fly along the stream bottom is a three dimensional thing unlike drifting a surface fly which is two dimensional.  It's a matter of avoiding drag.  When I present my flies I cast upcurrent to ensure that everything lands in the same current through which I want my flies to drift.  This is my targeted area of drift and, just like when I shoot a firearm, I always choose my target before I execute my cast.  All of this pertains to whether I'm fishing a sighter or indicator system.  

My desire is that with every presentation my fly and leader is aligned in the same current.  O.K., so I admit I'm not perfect and it doesn't happen every time ... but I'm working on it!  My experience has revealed that when we present a nymph with weight either in the fly or on the tippet in a manner that has tippet angled cross current through the water column the flies will drag through the varying currents and the odds of achieving a drag-free drift are at best greatly diminished. Aligning flies and tippet to land in the same current usually eliminates this problem. 


A bit of experience fishing a sighter system reveals the fact that there's a fine line between keeping tight to weight without impacting drift and pulling or lifting flies out of the drift.  Here's where it's possible to effectively fish an indicator system at distances greater than a sighter system.  I mentioned earlier that an indicator acts as a form of an anchor to hold in place in the surface film.  This provides a benefit with regard to inhibiting the effects of keeping a high rod tip position and subsequently  allowing the angler to keep a good amount of leader and line off the water.  This holds true for both more direct upstream presentations and across current presentations.  The benefit in upstream presentations is fairly obvious;  however, the effectiveness of across current presentations needs some more explaining.  

I'd bet the majority of anglers envision all presentation as straight line casts from rod tip to end of tippet.  If this be true then we'd be casting and presenting across - and through -  varying currents from indicator to flies.  We do this and the benefit of keeping everything off the water from indicator to rod tip is out the window.  So, the question is:  how do we execute a cross current cast and have the indicator, tippet and flies land in the same current?  It can be done!!  And, surprisingly, it's not that difficult.  Hey, if I can do it...you know where I'm going with this.


Casting weight is a lot different than casting only an unweighted fly.  Interestingly, this actually works to an angler's benefit when casting an indicator system.  When executing an overpowered side arm cast with the rod parallel to or angled slightly upward to the stream surface and checking the cast abruptly the angler can force the tippet and weight (that's from indicator to weight) to create a sharp angle with the indicator being the point of intersection thus allowing the indicator, tippet and weight to settle on/in the same current.  By having presented the flies this way the only part of the system that has actually crossed any of the currents from rod tip to indicator is the leader and possibly some fly line.  By keeping the rod tip high as well as reaching out as far as possible you may be surprised to see how much line can be held off the surface currents that might otherwise impact our drift.  A bit of experimentation will reveal how far across the stream you can present without having anything from rod tip to indicator on the water.


For larger streams or stream sections which don't allow ease of mobility longer casts still allow for presenting flies at distance.  It helps to take a good hard look at surface currents to determine best line placement for the initial presentation.  Once flies are in the water we have to rely on the indicator to provide feedback and mend periodically to achieve the longest effective drift.  The best mend is one that doesn't impact the indicator's drift;  however, if the impact is minimal don't be afraid to allow the drift to continue.  One way of looking at this is to envision how we might mend to prolong the drift of a dry fly.  Sometimes we mend and see no impact on the fly's drift.  If mending causes the surface fly to move but it doesn't result in the fly sinking it's customary to let the fly continue to drift until drag pulls it under.  

Here's another fact regarding drifting nymphs with an indicator system.  Depending on conditions it is possible to achieve significantly longer drifts if an angler learns how to introduce controlled slack for the greatest advantage.  I won't give you any examples to support this statement because I'm sure there are those who wouldn't believe me.  Enough said.

Obviously, the vast majority of time I want to have my bottom fly drifting right along the stream substrate.  So, how much weight do I use?  Well I'm not one to say I use a particular size bead.  In fact, when I ask another angler how much weight they're using and they respond with bead size I'm as uninformed as before they uttered their first sound.  To me, weight is not size and size is not weight!!


The vast majority of my nymphing is with a drop-shot system.     When drop-shotting and those infrequent times I put a shot on my tippet a few inches above my fly I'm using split shot.  As I stated in earlier in this series I know how much each shot weighs.  O.k., that's fine and dandy but how do I determine how much weight to use for the first cast?  Well, that depends on current speed and depth.  Obviously, faster and/or deeper requires more weight than shallower and/or slower.  That's a no-brainer.  Over the years I've come to the point that I can be pretty much right on right away;  however, if I'm not quite sure I always start out on the light side.  It only takes a couple/few drifts to know if I'm good or if I have to add more weight.

All of the above brings us to actually fishing.  I knew we'd get here at some point in time.  Ain't it great??  I related earlier what I look for to determine where to drift my flies.  Really, it comes down to imagining where trout might be holding.  From there I plot my presentation to have my flies drift through the area I've targeted.  It's a matter of determining where my flies should enter the water column and at what angle to ensure their quick descent. 

While weight gets flies down we can't ignore the effects of the leader tippet on fly descent.  With leader landing on the water parallel to the surface descent is inhibited.  The longer it takes the flies to get down to depth the shorter the effective drift length.  There is good reason for saying the flies should always land first.  This has the tippet coming down to the water at an angle which allows for the flies to descend quicker.  One of the best casts to achieve this is the tuck cast.  The steeper the tuck the less impact on the descent through the water column.  Once you get the tuck cast down you find that you can back off a bit on the amount of weight needed to get the flies to depth.

Well, there we have it.  Now it's time to take all of this, put it together and go fishing.  The more we do the better we become.  We become better at determining where trout hold.  We become better at presenting our flies more accurately and we become better at recognizing takes.  And all of this means we get to admire more trout as they're brought to hand! 


DAVE ROTHROCK'S APPROACH TO FISHING NYMPHS, PART 4:  FLIES, ACCESSORIES AND RIGGING

FLIES

Some who read this will know that I have chosen to remain "old school" with my approach to the nymphs I tie and fish.  So, what is "old school" you may ask?  Best way to answer is to say I tie and fish mostly non-beaded nymphs.  Go back and read that last sentence again and you'll see that I said mostly.  Yes, I do tie and fish a beaded nymph now and then.

When I go into a fly shop and peer into their fly bins most of the nymphs they sell have beads.  Hey, that's fine with me.  I certainly have nothing against beaded nymphs.  However, there's something beyond this that glares back at me very powerfully.  It's easy to find a good Sexy Walt's or a Frenchie or a Red Dart or a Perdigon.  Try to find a good Blue Quill or a Quill Gordon or a Hendrickson nymph.  Yup, the tastes of those anglers who fish nymphs have changed.  


I've always justified my fly-tying approach with the statement, "I can't buy the flies I want to fish."  This is more true today than ever.  Sure, we can still find the common Hare's Ear and Pheasant Tail nymphs but most of these are tied with beads nowadays.  And here is where I have to admit that the majority of my beaded nymphs are these generic flies.  Hey, they flat out catch fish!  Too, the vast majority of the time I fish a dry-dropper set-up I'm fishing streams that I feel don't warrant a more intricate pattern to tempt more "sophisticated" fish.  And for those of you who are thinking this argument is shot down by a Perdigon nymph duping large numbers of wild browns on pressured water...you'd be right on that one!


So, if a Perdigon takes a good number of wild browns on a regular basis why, for Pete's sake, do I invest so much time tying the patterns I choose to tie?  I'll try to explain my (mostly speculative) reasoning.

Humans and trout alike are curious critters.  An example:  a human walks into a shop, sees an item that piques the curiosity factor, walks over to the item, reaches out and takes said item into hand to examine it.  All this time said human has absolutely no intention to permanently posses said item.  Once human's curiosity has been satisfied the item is returned to it's resting place and human moves on.  

I've observed a number of trout over the years.  As they hold in the current they frequently move slightly to intercept something drifting to - or very near to - their holding position.  Most times as they have taken the item into their mouth it remains only for a slight moment and then it is expelled.  I don't believe the trout ever had any thought (yeah, I know, trout don't really think) of making that object a part of their daily caloric intake.  Their intent was to satisfy their curiosity.  

Somehow you gotta' admit this almost makes sense, doesn't it?  So, let's go back to the question about why a Perdigon nymph is so effective?  My answer:  they look nice!  O.K., it may be a little lame but it's my story and I'm stickin' to it!!

I'm one of these folks who goes out, catches the real critters, brings them home and photographs them in their watery environment.  From there it's on to the tying vise to somehow transfer - through the power of suggestion - what I see in the real critter to my fly.  I'd like to hope that what I produce by combining fur, feathers and at times other stuff might just suggest what the trout take to satisfy their need for caloric intake.  No beads, no hot spots.  Just materials applied in such a manner as to suggest life...with a BIG maybe.  And, yes, I get a bit of satisfaction from so doing.  It ain't the same as tying a Red Dart or a Frenchie, that's for sure!


Now, don't get all beside yourself thinking I have anything against those flies or any other bead head or jig nymphs.  I don't.  Again, it's whatever trips your trigger.  There is, however, one other major difference in my nymphs and that's the fact that I don't use any weight in my flies.  I place all of the weight I need to get my flies to the depth I want them on my leader.


After all, does it really matter if a trout inhaled our fly out of curiosity or need for caloric intake?  Hhmmm, something to think about.

ACCESSORIES

Next up is what I refer to as accessories:  strike indicators, weights, and the like.  As with so many other things its all boils down to personal preference.  

Let's begin with strike indicators.  And, no, I don't call them bobbers.  First one up is the New Zealand strike indicator.  Good stuff.  Floats like ... nah, I can't say floats like a cork since it's not cork.  I guess I'd best say floats like a tuft of wool since that's what it is.  It comes as a complete package:  wool, tubing and a tool to attach it to the leader.  I found early on that I can easily get by without the tool.  Loop my 4X tippet, run it through a small piece of plastic tubing, place a tuft of wool through the tippet loop and pull tippet tight.  This brings the base of the doubled over wool into the tubing and, if there's enough wool in the tubing, it holds in place pretty well.  I really push it by using so much wool I can barely get it to go into the tubing.  I also don't cut the wool short if I can avoid it.  I like to keep the wool long because when it rides on the surface it usually stands up vertically and it's really sensitive.  While this indicator can be moved up and down it can't be moved over any knots.  This isn't a problem for me since I use a long (at least 5') knotless tippet.  While I was surprised at how much weight a hefty chunk of wool can support when it is dressed with fly floatant it's also an indicator you might want to avoid when a stiff breeze is blowing.


Next up is the Airlock indicator.  I like 'em.  They are easy to attach to leader and, other than having to be careful not to loose the little rubber washer when putting one on or taking one off, the only other points to make is that they float very well and they're easy to reposition.  Oh, and they come in 3 different sizes and a variety of colors.  My first preference is white.  Check out the foam floating on the stream surface and that will explain why I like white.  Too much foam to be able to track your indicator?  Go to another color.

Another option is the Lightning Strike indicators.  These indicators have a hole through which the leader is threaded and they are held in place with a toothpick-like wedge.  Before I use one of these indicators I break the wedge to shorten the piece sticking out from the indicator.  One of the pluses of this type of indicator is that the wedge protruding from the indicator acts like a pointer to show me where my tippet and fly is in relation to the current.  If the wedge points in any direction other than up-current (I always have my wedge pointed toward the fly) my drift is screwed up in some way, shape or form.  Believe me, this happens a fair bit.  These indicators come in several sizes and a few different shapes and colors.  Choices, choices. 

All of the indicators I've included have one important thing in common:  they will not kink leader material.  It's why I don't use thingamabobbers or any other indicator which requires looping leader around to hold in place.  And for the indicators that paste on...YUK!   And as for the indicators that have a slit with a piece of rubber tubing I can never get them to remain on my leader.  I make a cast and off they go into the wild blue yonder! 


The only other accessories I'll cover are split-shot.  As I mentioned earlier I don't weight any of my non-beaded flies so that means shot are essential to getting my flies down where I want them.  Lead shot seems to vary from soft to not-so-soft and it doesn't always like to stay where I put it.  Then, there's the question whether the use of lead is environmentally sound.  My favorite split-shot is non-toxic shot available from Orvis.  It has a slightly rough black coating and it holds in place fairly well.  The other non-toxic shot I use is the Dinsmore shot with a green coating.  This coating comes off fairly easily.  No big deal except that I don't really like shot that's really shiny.  It's mostly tin and tin is shiny.  I just have to get over it.

RIGGING

I revealed in PART 3 of this series that I fish with a fly line.  No all mono rig for me.  I cut off the welded loop from the line since I've found that, especially with single foot guides, loop-to-loop connections don't like to slip easily through the guides.  Too, they are extra weight.  It's what happens when line is doubled over line to form the loop.  And that's not all.  Can you imagine playing the best fish of the year and the weld breaks.  Bye, by leader, fly and ... trophy!  Don't think this hasn't happened.  Removing the loop eliminates your being at risk of becoming a victim.   

A nail knot is what I use to connect the leader to the fly line.  Some folks would recommend a needle nail knot and that's certainly an option.  I've never considered a nail knot an easy knot to tie.  In fact, over the years, I've had friends come to me to tie their nail knots because they felt they were too hard to tie.  I never could understand that.  I'm pretty sure those folks were happy when welded loops came on the scene.

There are two knots which are commonly used to connect sections of leader material together:  the   surgeon's knot and the blood knot.  When connecting larger diameter sections together the surgeon's knot is the more bulky knot.  This isn't really an issue with smaller diameter material.  I've always used the blood knot for this purpose.  Another factor to consider is that with the surgeon's knot one tag end angles toward the fly and the other angles toward the butt.  The blood knot has both tag ends coming out at a 90 degree angle from the leader.  I prefer this particularly for my dropper tags.  I believe this contributes to keeping my flies away from the main tippet and reduces the potential for my dropper tag to wrap around my tippet.  The more time I have to dedicate to tangles the less time I have to fish. 


When I use my indicator rig with the knotless tapered leader having a small perfection loop I've tied at the end, I attach my tippet to the loop via a clinch knot.  With my knotless leader cut back to 2X or 3X the perfection loop holds up well over time and it is really easy to change out a tippet.  

I hear that familiar sound of brains questioning why I haven't mentioned tippet rings.  Well, that's an easy one to answer (really?).  I normally say I'd lose all of the rings fumbling away trying to tie one onto my leader.  I know this is a lame excuse but when you don't want to do something one excuse is just as good as another.  I just like my blood knots! 

So, why do I use dropper tags?  Why, when fishing multiple flies, don't I tie off the bend of a hook or directly off the eye of a hook?  I'll admit there's a bit of speculation included in my explanation.  First, I believe that with tippet tied onto the bend of a hook it may inhibit hooking potential with a trout's mouth parts coming in contact with the leader material and pushing the hook point out of the way.  Another issue applicable to both is that it takes more effort to change a fly.  In contrast, with a dropper set-up when I want to change a fly I only have to change out that fly and go back to fishing.  Sure, I'll admit it.  I'm a bit lazy.

For attaching fly to tippet I still use a clinch knot.  No, I don't use the improved version.  The key to tying a good clinch knot is pulling the tag end tight so there's no slippage.  Too, I've seen knot strength tests and the regular old clinch knot is stronger.  Goes to show just because something is labeled improved doesn't really make it better.  I still think I need to check out the Davy knot a bit further.  After all, the name sounds a bit catchy, don't you think?

So, there you have more of MY take on things.  And more food for thought for the reader...      


Let's get one thing out of the way right now.  I do not fish an all mono rig.  It's just not for me.  I happen to be one who likes the feel of a fly line.  I feel like I have more control gripping fly line rather than mono and that's good since I happen to be a bit of a control freak.  And please don't misinterpret this to mean I'm anti-all mono rig because I'm not.  If it trips your trigger fire away!

And then there's this business of my being a stickler for demanding versatility in my choice of equipment.  Yup, that includes a fly line.  In fact, the fly line is one of the most critical components.  Why so, you ask?  Well, if I need to be able to switch from drifting nymphs to presenting a dry fly the line is an important component contributing to the cast.  Yeah, there's something else that comes into play here but I'll cover that a bit later.

Go back a fair number of years and everything was geared to fishing tapered lines for all types of fly fishing with double tapered lines being the more popular.  Yeah, there was some talk of using other lines and there was one that I recall really stood out:  the rocket taper.  This was the label Cortland Line put on their weight-forward lines.  Since I was always thinking of delicacy in presentation I just couldn't associate rocket taper with delicacy.  

For some crazy reason from the time I began fly fishing I felt that by using a fly line smaller than what was recommended I'd be presenting my flies more delicately.  It's true that I didn't have a clue as to what I was doing and I had nothing to hang my hat on regarding this approach.  Of course, back then a 4 weight line was a very light line and that's where I drew the line.  I felt no need to go any lighter at the time.  I fished everything from soup to nuts on the same line.  It's just what we did.

As time passed I began fishing a 4 wt. rod with a 2 wt. weight forward line and I wanted as long a front taper as I could get.  Again, think delicacy.  And, yes, I fished nymphs and dries on the same set-up.

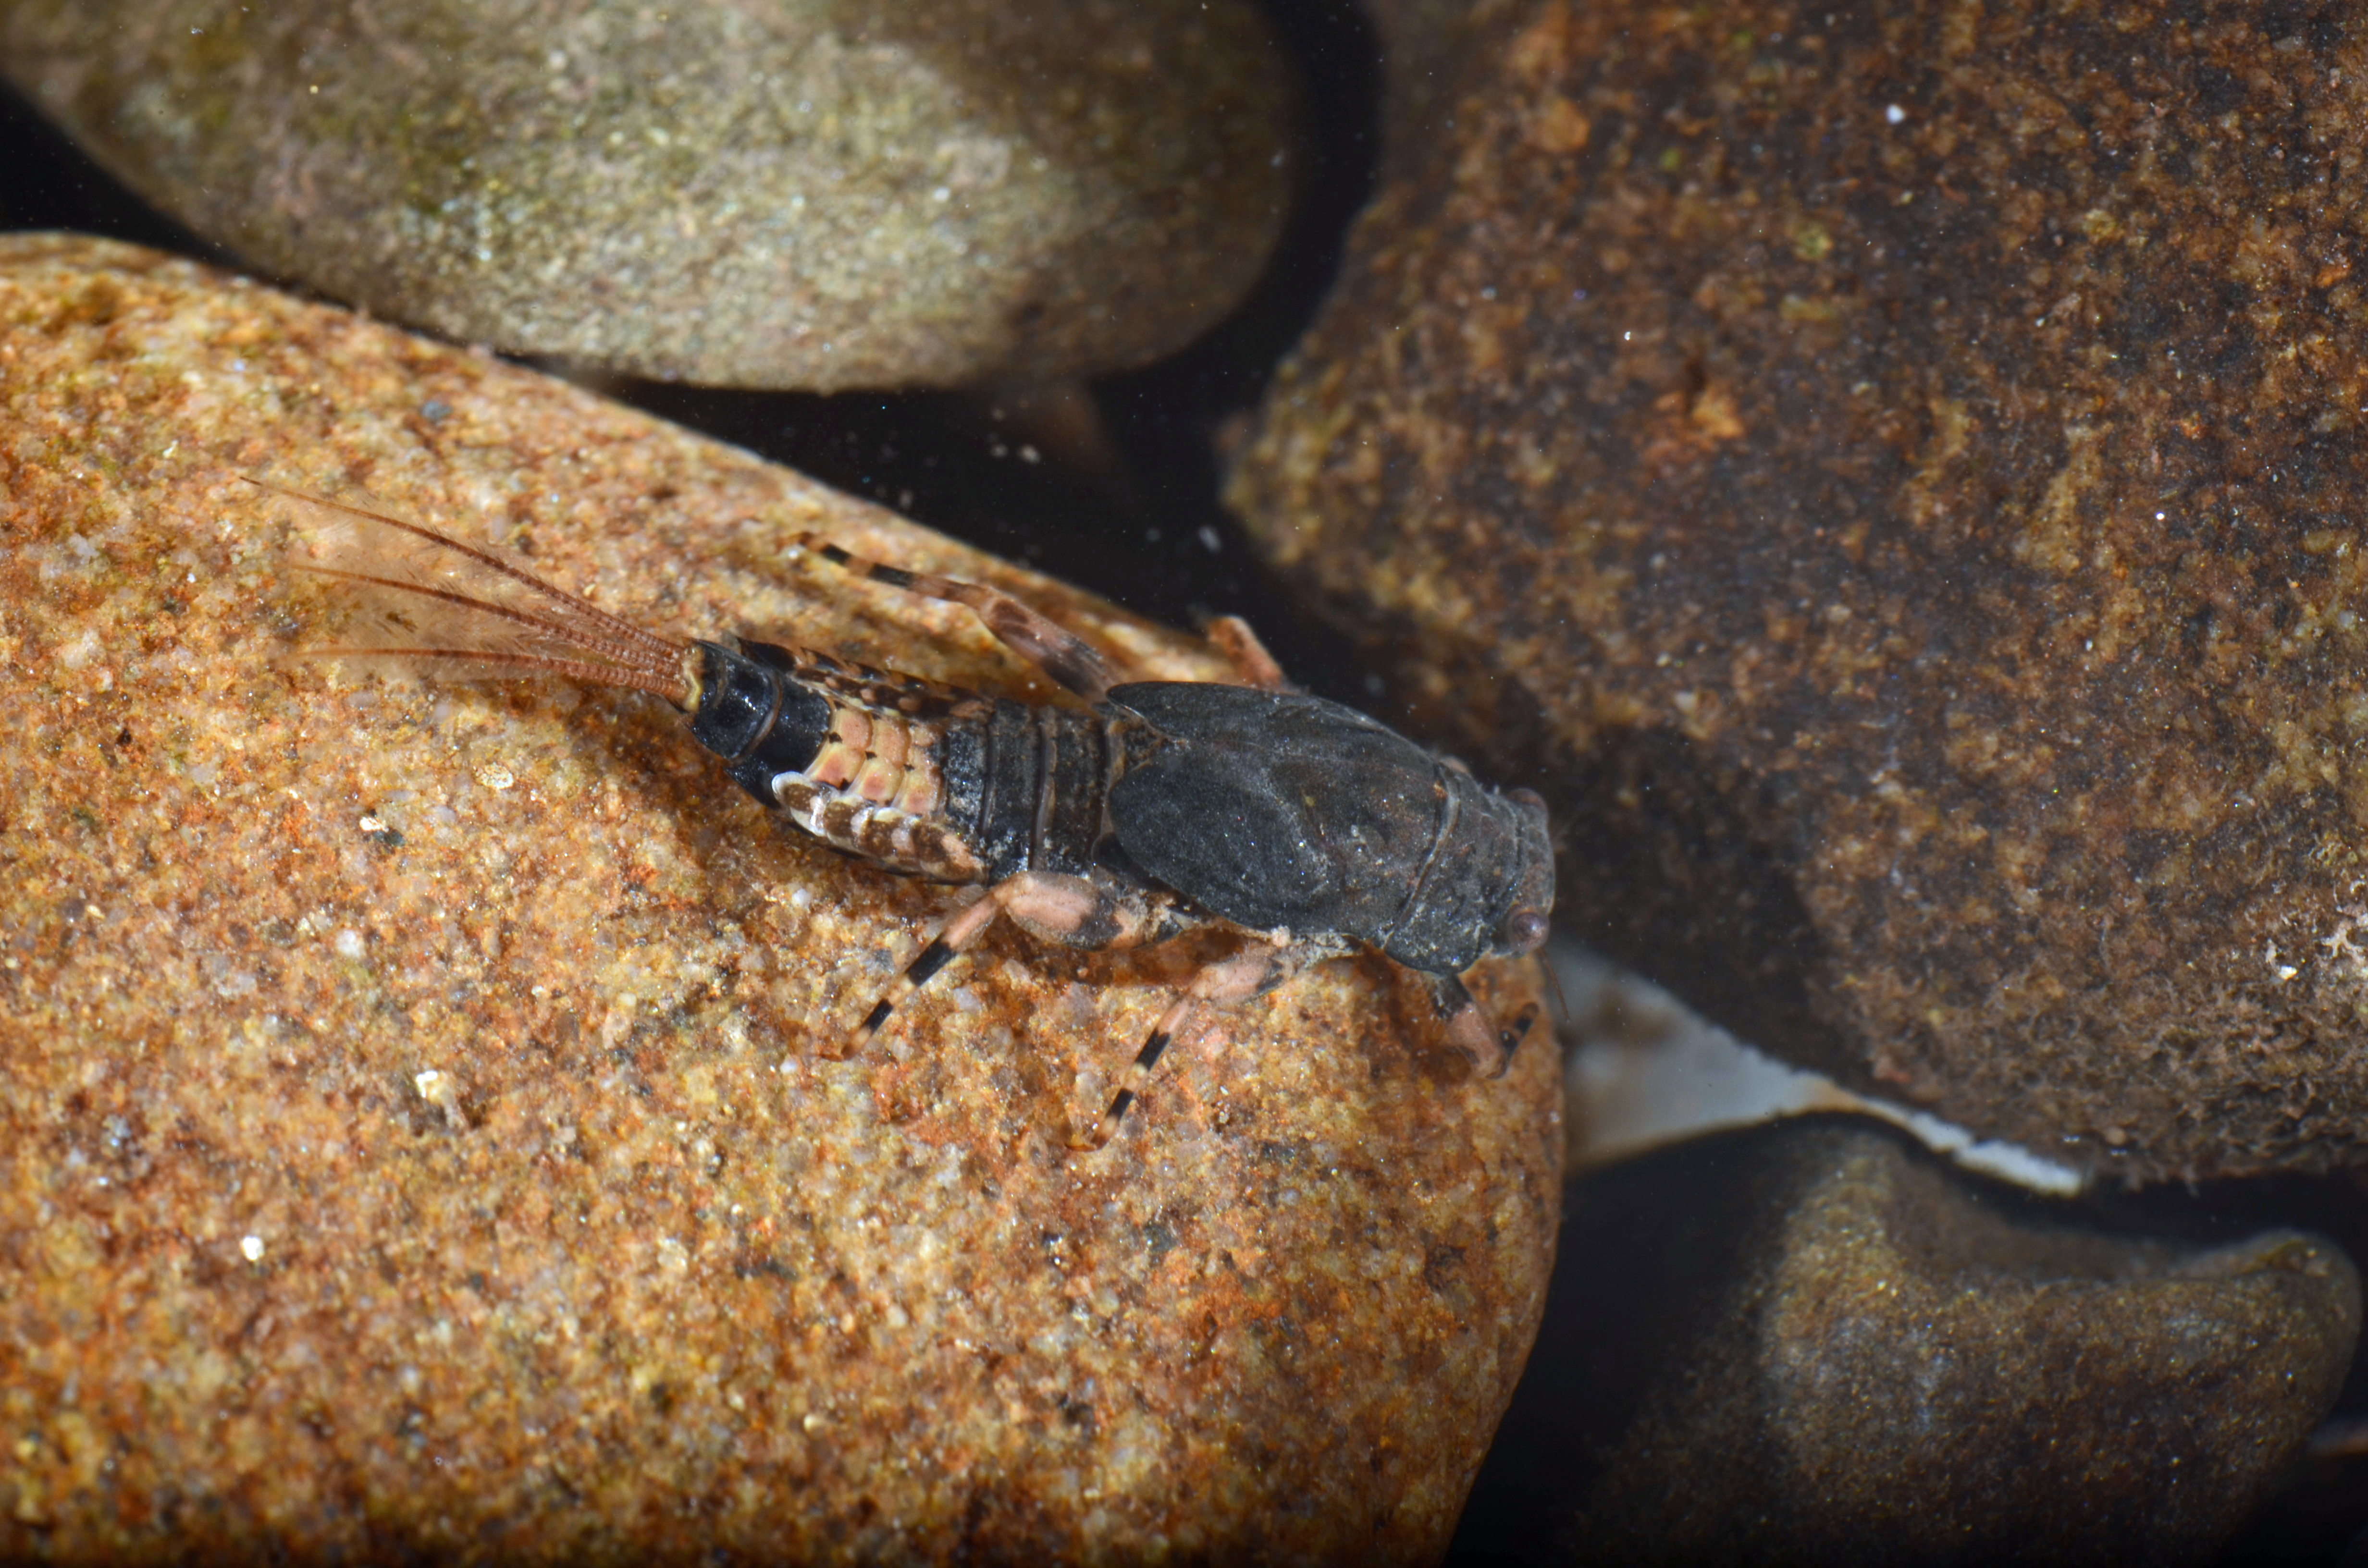
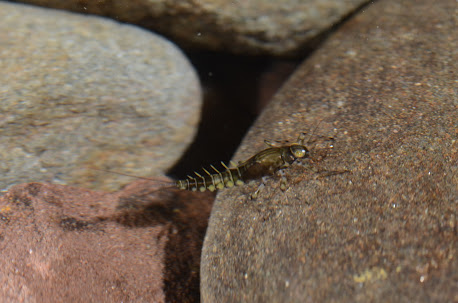
Along comes the Euro nymphing line.  The vast majority of these lines are level lines with a diameter of .022".  As I see it these lines are designed for one application:  fishing nymphs and allowing competitor fly fishers to meet the tackle requirements for competitions.  Leaders can't exceed twice the length of the rod so a fly line is a necessary component.  

So, what's the big deal?  While some of my friends might say I'm a fairly good caster I can't cast a dry fly with any degree of acceptability with a .022" level line!  It just doesn't work for me.  If I'd use a Euro line I'd be going crazy when fish would start to rise and I just don't need that kind of hassle in my life!  I know that some anglers carry a second rod or, at minimum, a separate reel or reel spool to switch to something with which to present a dry.  Not my cup of tea, folks.  Wwaaayy too much time and effort spent switching things up.  By the time I'd be ready to fish the hatch would most likely be over.  Talk to my wife and she'd tell you I'm really that slow!

With versatility such an important factor for me I've had to determine how much I'm willing to compromise in my choices.  As crazy as it sounds I have to defend my choices to my worst critic:  ME.  And here is where it may get a bit interesting... 

Based on my personal fishing experience as well as talking with and observing other anglers I believe it is only the rarest of occasions that someone fishing with a sighter system has more than 4' of fly line out beyond the rod tip.  Whoa, wait a minute!  What about that greatest of taboos called sag??  Oh boy, here we go.  My take on this is that way too much emphasis has been focused on this issue.  Yeah, it's true that sag is due to weight of line and, to a much lesser extent, leader.  For me, I actually find a little sag - I call it manageable sag - desirable.


I posted on social media some time ago that I was thinking about the issue of sag relating to the fly line.  Wow, did I get some "interesting" comments.  Many folks commented about the all mono rig being their choice even though the post related to fly line.  Of those who stuck to the issue, most felt that there's a big difference in weight between a Euro nymphing line and a tapered fly line.  Unfortunately, they had no idea what I had in mind as I deliberately withheld that info.  It was obvious that those who responded that way were thinking of the more popular line weights anglers typically use for fishing a variety of fly types.

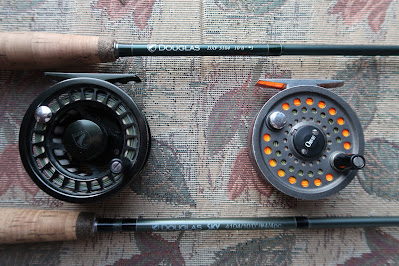
So, what tapered fly line do I prefer when using a sighter system and why?  First, I use the same line whether I'm fishing my 3 wt. or 4 wt. rod.  It casts a dry adequately on either rod even with my longest sighter leader.  The Cortland Classic Spring Creek 2 wt. serves me very well.  That's right, a 2 wt. line on even a 4 wt. rod.  It works.

Now, let's get into the nitty-gritty.  You'll see this info is directly related to the issue of sag since the key here is how much a section of fly line actually weighs and now we go back to something I related earlier.  Using the first 4 ' of fly line I weighed both the Spring Creek and a .022" Euro line.  O.K., O.K., I cut the welded loops from both lines before I did anything else.  Gotta get rid of those pesky, heavy, bulky loops!  I weighed 1', 2', 3' and 4'.  Here are the results with all weights recorded in grains.

.022" Euro line:  1' = 1.3 grains;  2' = 2.8 grains;  3' = 4.4 grains, 4' = 6.2 grains.

Cortland Spring Creek 2 wt.:  1' = 1.6 grains;  2' = 3.6 grains;  3' = 5.5 grains;  4' = 8.1 grains.

Here's where it's important to ensure we know the difference between grams and grains.  There are 15.43 grains in 1 gram.  Obviously, grains are the more precise measure.

And, yes, you're reading the info correctly if your mind registers the fact that there's only 1.9 grains difference in 4' of line.  To put it in simple terms 1.9 grains is the equivalent of 1 1/2 bare size 10 2xl nymph hooks!  Sorry to burst all those bubbles out there but, in MY mind, that difference is miniscule.  Somehow I'm thinking it would take a sharp eye to discern the difference in sag between these lines especially when there's less than 4' of fly line beyond the rod tip.

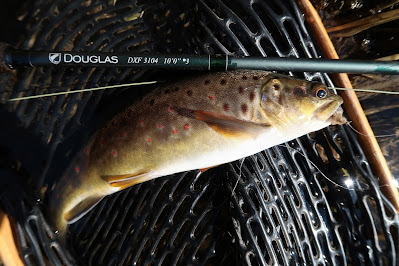
What contributes to the 2 wt. coming in so close to the Euro line?  It's the profile.  The 2 wt. has a 4' level front tip and only begins to taper around that point.  How well does this 2 wt. perform?  In my hands I can present a dry out to about 60'.  No reason for me to have to cast a dry any further.  When you think about what it takes to switch from nymph to dry it's just a matter of taking one off and tying on another.  Sure, there are times I may have to go down in tippet size but making that adjustment doesn't add much more time to the equation.  And, yes, that's what I call versatility!!

When I arrive at the stream and determine that conditions would make fishing a sighter system difficult I have no problem with using an indicator.  I know there are anglers out there who feel this is inferior to a sighter system;  however, I'm not one of them.  As I related in a previous piece I scoffed at using indicators for years until I started using them.  Over time I've developed a fair amount of respect for fishing nymphs with an indicator system.  

No doubt I can just put an indicator on my sighter leader and fish and I do that now and again.  It's definitely a viable option;  however, I choose a different route when I know I'll be fishing an indicator system from the get-go.  Oh, yeah, this system meets my requirement for versatility quite well, too. 

When I choose a line geared toward casting the additional weight of an indicator or, in the case of an indicator which provides air resistance when casting I want a line that's front-loaded.  Now, some of you may be wondering what in the world do I mean by front-loaded?  A line having a short taper puts more of the weight of the line toward the tip of the fly line.  Hence, when there's more line weight toward the tip the line is front-loaded.  This aids in turning over the indicator's weight/resistance to casting...at least somewhat.  Here's another compromise on my part.  While some additional fly line weight is acceptable and may even be desirable I still use a very light fly line. For this application I'm using a Cortland Trout Boss Double Taper 2 wt.  This is about the time some who read this begin to chuckle and say, wait a minute.  You want more weight and you still use a 2 wt. line??  That's hilarious!!  Chuckle you may but in the end it works!  Yup.  First, it's not a true 2 wt.  A 2 wt. line should weigh 80 grains plus or minus.  And that's in the first 30' of line, of course.  This line weighs 100 grains.  Isn't it interesting that a 3 wt. is supposed to weigh 100 grains.  So much for what we're seeing in the world of fly lines these days.  Too, this line has a 6' long taper which is a bit shorter than the average.  So, yes, it does give me some additional weight which is enough for most of what I want it to do.  Of course, I use a totally different leader system when fishing this line with an indicator.  I'll cover that in a bit.  Oh, hey, before I forget let's get rid of the welded loop on this line, too.  It doesn't help and in fact it's flat out a pain. 

Now that I've established my choices for fly lines for fishing nymphs - and more - and the reasoning behind them it's time to move on to leaders.  There's been an interesting...I'll call it evolution...in thought and application regarding leaders for nymphing and I'm sure that many - perhaps even most - anglers would agree.  When I say this I'm referring to sighter leaders.  In contrast, leaders for fishing indicators don't seem to get anything beyond the most insignificant attention these days;  here, however, I'll be covering them both.


When I was first introduced to a sighter leader I thought, "hey, now that's pretty nifty!"  I could actually see what was going on with my drift and the visual feedback was wild!  Of course, when you're reading this and picturing in your mind what I may have experienced back in the mid-70's is most likely different from what I had.  While we used Maxima Chameleon mono for some leaders the sighter leader I began using used something different.  Think of a mono that's much more visable.  If for some crazy reason Stren fluorescent clear blue spinning line popped into your mind you'd be right on the money.  And yes, it's what I still use today.

There are some significant differences between Maxima and Stren.  Let's look at Maxima Chameleon first.  I think we'd all agree it isn't easy to see and that means it makes following any part of a leader tied with it very difficult at best.  I'm one who kinda' likes to see as much of my leader as possible when I'm focused on watching my drift.  The more feedback I can get the better it is for me to detect any abnormality in my drift.

Another characteristic of this material is that it is stiff.  I've always felt that stiff mono doesn't transmit "feel" as well as soft mono.  Think about that.  With the emphasis on "feel" or sensitivity nowadays I've often wondered how much thought most anglers have given to how it might play in leader material.  I've said it before and I'll say again I believe there's way too much emphasis placed on feel or sensitivity;  however, for those who count it important this gives them something to ponder.  

Finally, there's this business of diameter.  For the most part it's how we relate to the size of the material we use to construct our leaders.  Now, I'm one of these folks who questions most everything.  I like to know what I have and use.  Same goes for leader material.  My experience with Maxima Chameleon is that when I put it to the micrometer test it ain't what it's supposed to be.  This stuff pretty much runs .002" larger than it's labeled.  That's a lot in my book.  Maxima tells us this material is more abrasion resistant.  Well, when you have that much more material than what I've been led to believe it will be so!  

Let's go a little deeper with this diameter issue as it relates to Maxima Chameleon.  Some leaders start out with 20 lb. test which is labeled as .017".  Many anglers who aren't using one of those micro leaders tend to use what I call a "middle of the road" butt section of 12 lb. test which is shown as .013".  Add .002" to these diameters and let's go from there.  It's true that I would/could not use a butt section of .013" because it wouldn't do well when casting a dry fly and that makes it unacceptable.  A .015" butt section is a whole different ballgame.  Even so, I still wouldn't use Maxima.

Now, let's consider the characteristics of Stren fluorescent clear blue mono.  First, it's visible.  It gives me feedback and that's a positive.  Second, it's soft.  Should transmit "feel" a bit better.  Third, it runs fairly true to labeled diameter when put in a micrometer.  How 'bout that!  Using my rating system it beat out Maxima in the three important categories.  I'll take it!!

I almost hesitate to even mention the more recent interest in micro leaders.  Can't cast a dry fly with one so no more needs to be said.

Do I have more than one sighter leader formula?  Yup.  Why, you ask?  Well, over time I've experimented and I've just kept the formulas.  Now, for small streams not only will I use a shorter rod I'll also use a shorter leader.  One interesting note is that I've offered a leader to some folks in the industry and I was surprised when they indicated a preference for a shorter leader.  Personally, I find it aggravating when someone only talks in generalities like longer and shorter like I just did.  So, for clarity my longest (and most frequently used) leader will measure up to 20' to my shot when I'm rigged for fishing two nymphs.  The short leader will be around 11' to 12' to the shot.  When I use the short leader I'm usually fishing only one fly and I'm fishing smaller water.

There's an old standard guide for constructing leaders:  60% butt section, 20% mid-section and 20% tippet.  It's a guide and believe me when I say I stretch it to the limit.  True, all things have their limit but I'm always pushing it.  Here are two of my leader formulas with one representing the longest and the other the shortest.   

.018" (20 lb. Blue Stren) - 26"

.016" (17 lb. Blue Stren) - 22"          86"

.014" (14 lb. sighter mtl) - 16"          22"

.013" (12 lb. Blue Stren) - 12"          18"

.011" (any sighter matl)   - 10"          14"

.009" (matl of choice)      -  8"           12"

Below 2X (.009") I use about 60" of 4X (.007") and that's about as low as I go.  For years I'd go down to 6X (.005") and every once in a while 7X (.004").  I've determined there's no need to go lower than 4X after I really gave some thought to what goes on with a tippet drifting through the current with weight attached at the bottom.  It's not at all akin to drifting an unweighted fly on the surface.  And then there's the fact that trout aren't leader diameter shy;  however, they are leader drag shy.  

Here are some additional factors I've had to consider when determining what I use.  First, I don't use fluorocarbon.  I think I'm starting to hear some rumbling about now and it isn't my tummy reacting to what I ate for dinner.  I won't repeat myself because you read it right the first time.  Why, you ask?  Because I don't believe the potential benefit - and I believe there may be only one - isn't worth the cost.  It's a heck of a lot more expensive than nylon monofilament.  Yes, it's heavier than water and that means it sinks.  Hey, once mono absorbs water it becomes neutral buoyant.  Not a problem.  And now for the biggy.  Fluorocarbon is stiffer than mono.  While I'm not saying it's impossible to convince me otherwise I'm not so sure that the increase in stiffness over mono may just negate the idea of the finer diameter providing any benefit as the tippet rides through the current.  Just a thought...  But it's enough to bring me to the point where, as indicated earlier, I rarely go below 4X in contrast to those who regularly fish 6X or 7X.  So, what's the one benefit fluorocarbon may have?  Abrasion resistance...maybe.

One thing I discovered as I looked at some of the new mono offerings out there.  When I put a micrometer to them it became apparent as to why they're so much stronger than the standard stuff:  some are up to .002" larger diameter than what they are labeled.  If I want 4X I want 4X, not 2X!

Now that I've covered my sighter leader approach we can move on to what I use when I fish an indicator system.  Sure, in a pinch I can just add an AirLock indicator and I do just that.  Most times when I get to the stream I know right from the start it's not a day for a sighter system and out comes my reel with the double taper line with a leader I find more suited to fishing an indicator.

Here's where I do almost a 180.  Rather than constructing an entire leader I start off with a standard knotless 3X or 4X tapered leader and most of the time it's a 9 footer.  I cut the leader back about 1 1/2' from the tippet end, tie a very small perfection loop and attach a section of 4X about 5' long.  I want this long tippet with no knots at least 3' down from the connection with the knotless leader.  One of the indicators I like to use doesn't play well with knots and I need to reposition the indicator as I encounter different depths and current speeds.  A small change can make a big difference at times.

When it comes to adding my nymph(s) and weight I do it the same whether I'm using a sighter or indicator system.  I'll cover specifics in a later article.  Oh, and let's not forget that all of these leaders will turn over a dry fly.  Versatility!!

So, there we have MY approach to lines and leaders.  Under no circumstances would I say my choices and reasoning are superior to anyone else's.  It all boils down to knowing what we like and having confidence in our choices.  It helps if the results we see satisfy our expectations, as well.  

Next up:  Flies, accessories an a bit more on rigging.  Stay tuned!  


.             


Think about starting out with a 6 1/2' Shakespeare Wonderod.  Not the most desirable tool available for the task, is it?  Yet, that's what I had.  And you know what?  It worked!  As time passed I moved to a 7' Fenwick.  No graphite rods back then since they hadn't yet hit the market with any real impact.  And both the Wonderods and the Fenwicks were considered some of the better glass rods in the day. 

Talk began to circulate about the new and greatly improved material called graphite.  I figured it was time to make the switch and I became the proud owner of a Fenwick 8' 5wt. graphite rod.  Wow!  What that rod did for my casting was amazing...or so I thought.  I think there was some play on psychology going on with that one.  

It was about this time I was introduced to more advanced ways to fish nymphs;  however, the emphasis was on more effective ways to detect takes and that was all in the leaders.  Rod length and, along with that, line weights weren't a point of focus.  As I remember most of my trout fishing, regardless of whether I was fishing dry flies, wet flies or nymphs, was with rods of around 8' in length.  Pretty much making do with what we had.

Along comes the 9' rod.  Definitely a rod length that provided me as a fisher of nymphs an advantage.  Much better reach for expanding my zone for effective presentations.  My rod of choice became a 9' 4 wt. and I wanted it in at least a medium-fast action.  My thinking was - and still is - that a faster action rod transmits strike response from rod tip to fly more quickly;  hence, more and better hook-ups - I hope!.

For many years I stayed with my 9' 4 wt. rods.  They handled all that I put them through with no problem.  O.K., O.K., you got me.  I snuck a 9' 3 wt. in there at one point for use in skinny water situations.  Yeah, there were some 10 footers available but, after having casted one now and then, I felt they weren't anything I'd want to consider adding to my rod inventory.  It's important to emphasize that while I used my rods for nymphing I also used them for fishing dries.  I felt that the long rods early on were heavy and...well, flat out clumsy and/or clunky.  Not something I'd derive any pleasure from fishing, for sure.

Then, along came my involvement in the world of competitive fly fishing.  Nope, I didn't compete;  rather, I was brought on as a board member for the U. S. Youth Fly Fishing Team.  I was also invited to be one of the instructors. Now I'm seeing all of these 10' rods in the hands of these young anglers.  And, not surprisingly, they were primarily fishing nymphs.

The long rods used by competitors weren't like the 10 footers of yesteryear.  They were actually not bad.  Still not enough to get me really interested.  I just didn't like the soft tips.  So, what did I do?  You guessed it:  I kept fishing my 9 footers.

I finally convinced myself that consistent reasoning must apply here.  If a 9' rod gave better reach then it should go without saying a 10' rod would give me even more.  Throw in the versatility requirement here.  The rods I use must serve me for more than drifting nymphs subsurface.  I am absolutely not one who would carry multiple rods when I'm on the water.  Nor would I ever want to find myself in a position to wish my vehicle were close by so I could go back and get my other rod to fish dries.  So, here's where I stand in regard to my rod choices.  Forget the drum roll and let's get to the meat of the issue. 

The rods sold today as Euro nymphing rods run from 10 to 11 feet in length and, for the most part, are listed for 2 through 4 wt. lines.  I find this a bit interesting since I believe that most anglers who purchase and fish these rods don't use double tapered or weight forward fly lines to fish nymphs. I believe the angler who actually uses a line weight matched to the rod is far and away the exception. Yes, I'm an exception - and one of a different sort, at that - but we'll get into that in more detail when PART 3 goes up on the blog.  While there appears to be a good number of anglers using an all mono rig most others seem to favor a Euro nymphing line which is level and .022" diameter.  Another interesting point is that some manufacturers tout these lines as for use with rods up to 5 wt.  Anyone familiar with tip diameters of fly lines and the increase in diameter as the taper progresses?  I am and I'm here to tell you these tapered lines are nowhere close to .022".  So, the question begs to be asked:  why the line weights?  Somebody want to pop in here and give me some insights??  Oh, and there's more but that, too, will have to wait until later in the series.

I believe that rods longer than 10' become specialty tools and that means they're single use rods.  At this point in time this eliminates my considering a rod beyond 10' in length.  I can tell you from a fair bit of experience that my 10' rods will present a dry fly at distance  with acceptable accuracy.  The label I'd attach to some 10' rods is...versatile in application.  All of this begs another question:  if these are marketed and sold as nymphing rods how much design thought went into using these rods to actually cast?  Hhhmmmm.  Longer rods?  Meh.


I'm sure that the vast majority of anglers would agree that as we consider the differences in rods as line weight ratings get lighter at minimum the rod tips get what we'd describe as softer.  This has a significant bearing on how broad a range of conditions certain rods may preform acceptably for nmphing.  I fish 12 months of the year when conditions warrant.  That means I encounter stream conditions from heavy, deep flows to low, skinny flows and everything in between.  I've found that it takes a stiffer rod tip to cast heavier weight with acceptable accuracy.  The more weight the more difficult it is to control the path of that weight.  I don't care what form that weight takes.  It's the same whether the weight is in the fly or on the leader.    

Then we have to consider what happens when we react to what we interpret as a trout intercepting our nymph.  Obviously, it's called the hook set.  There's a bit more to setting the hook with weight deep in the water column.  Both the weight and the current flow act to resist my effort to pull hook point into fish flesh.  The heavier and deeper the flow the more weight it takes to get the fly/flies down to the depth at which I want them to drift.  All of these factors combined means that it requires more on the part of the angler and the rod to counter that resistance.  The softer the rod tip the more difficult it is to do so with any authority.   Not only do I want to get that hook into the trout I want to do it as fast as possible with as much force as my tippet will withstand.  That means I hit hard and fast - relatively speaking.  The stiffer the rod tip the better I'm able to counter the resistance and get the action of the hook set to move the weight and the fly/flies.


Here is where the statement "there's no one size fits all" meets reality.  From what I see and based on the statements of many of my peers a 3 wt. rod seems to be the most popular choice among most anglers who fish sighter systems.  However, based on my experience my 10' 3 wt. Douglas DXF will handle up to about 1.2 grams of weight and, in a pinch, if I really have to, 1.6 grams (I said grams not grains as this differentiation will become important later in the series).  Anything more and it becomes more difficult to present and my hook set becomes what I can best describe as sluggish.  My Douglas Sky 10' 4 wt. is my rod of choice when I fish deeper, heavier flows with more weight.  I guess I have to give up a confession here.  My 10' 4 wt. is capable of handling most of the conditions I may encounter right down to skinny water.  It's that versatile.  So, why the 3 wt.?  It's a bit more fun and a bit more sensitive when I only need a little weight to get my flies to drifting at depth.  Still versatile, just not quite as much as the 4 wt.  Another confession.  Sometimes I do lament the fact that these rods are a bit softer than I'd like.  I know, woe is me!             


Some of you may notice I didn't mention anything about a 2 wt.  Sure, there are those anglers who choose a 2 wt.;  however, I feel these rods are specialty rods best used when flows are low normal to really low and little weight is used.  That's not for me.  In fact, based on conversations I've had with some anglers I believe there are those who push these rods well beyond what I consider their acceptable limits.

Since this is my approach to rod choice and, true to the title of this blog as being my opinions, observations and such, I thought it good to run them by...of all people...one who designs fly rods.  Here's where being a member of a pro-staff has it's benefits.  

Fred Contaoi is the chief rod designer for Douglas Outdoors.  Fred knows his stuff since he's designed award winning rods for Douglas over the past years.   First, he confirmed my position that the longer a rod the more difficult it is to cast - note, I said cast accurately.  It's a stability thing.  Rods over 10' long are designed for nymph fishing.  Second, he affirmed my position that the softer the tip the less weight it will cast accurately and the more sluggish the strike response with a lot of weight in deeper, heavier flows. Thank you, Fred!! 

While I could go on - and I just may allude to using a 9' 6 wt. for a specific type of nymphing later in the series ... maybe - I'd be remiss if I didn't address fishing small streams.  There are streams I fish where a 10' rod makes casting and fishing more difficult than I'm willing to tolerate.  Tight conditions call for a shorter rod and that's where my 9' Douglas DXF 3 wt. is my fishing tool of choice.  Believe me, a foot of rod length can make a big difference.  And we all now know my lengthy experience with 9' rods.

I'll end my take on rods with this statement.  I believe that the issue of sensitivity is a bit overrated.  While I can feel a trout take my fly now and then this is, based on my limited experience, primarily a visual game.  Visual first, tactile second.  There's some controversy for ya'!

While I've spent a bunch of time discussing rods I have a much simpler approach to reel choice.  Let's begin with a story related to me by a manager of a fly shop.  An angler enters the shop and wants to check out a rod for Euro nymphing.  He looks the rod over and mentions that the rod is a little heavier than what he was looking for.  Fly shop manager looks at him and asks how much the reel he's using weighs.  This angler had never even thought about his reel.  He had no clue!

When I consider a reel for my nymphing rods the weight is one of the most important factors.  Since I'm only looking at reels in the smaller sizes, usually for 2 to 3 or 4 weight lines, these will be the lightest reels available.  Surprisingly, there can be quite a variation in how much these reels weigh.  To me a difference of an ounce and a half or so is a major difference!

Why is the weight of a reel so important to me?  I'm holding my rod and reel out in front somewhere around chest level for what amounts to be a substantial length of time throughout my fishing day and when fatigue sets in it becomes a chore to do so.  The lighter the weight I'm holding the longer I can fish before fatigue becomes an issue.  And I want to fish as long as I can!

I could say that a good drag is important and ... well, it is.  The drag needs to be adjustable down to a point that will protect very light tippets.  By this you should be past the point of just guessing I like to play fish off the reel and, you would be correct!

Finally, for those of you who thought I forgot something, I pay no mind to balance.  It's just a non-issue with me.   

For me, I'm pretty sure I'll be looking at a new reel or two in 2022 and now everyone who reads this will know a good bit of what will be driving my decision making process.

And there you have it.  Dave Rothrock's perspective on rods and reels for fishing nymphs.  Let's keep foremost in our minds that this is how I approach these topics.  There's a reason equipment sales go way beyond that which I choose.  And yeah, there's a reason God created vanilla and chocolate!

Stay tuned for Part 3 of the series addressing my perspective on lines and leaders.  Here's where things will get way more interesting!     


Nymph fishing seems to be one of the hottest fly-fishing topics of the day.  I'm asked every now and then about it by individuals as well as having groups invite me to present on the topic.  Over the years I've developed and refined my approach to fishing nymphs so I guess we'd be accurate in saying I do it MY WAY.  Yup, I've developed the Dave Rothrock approach to nymph fishing.  It's not something that's set in stone since I'm always analyzing what I do to improve where I can;  however, there's one key thread that runs through everything I do.  I need to ensure that my system is versatile and allows me to adapt to changing conditions.  As with anything there's no "one size fits all" here.  And, yes, adapting to changing conditions includes, for me, being able to switch quickly and easily when trout begin feeding on the surface.  

With all of the printed material and videos on the subject I've decided to jump on the bandwagon and share my approach to nymph fishing.  To start it off I thought it appropriate to provide some background as to how it all began for me.  I'm calling this initial segment an introduction of sorts.  I believe it sets the tone for that which is to follow.  

My nymph fishing journey (a journey which I will never complete) began way back in 1972 when, having read a few articles on the subject in major outdoor magazines complete with photos of artificials, really hit me hard.  I had to give it a try.  After all, it made sense to me that this nymph fishing thing just might be the way to catch more trout.  

One Saturday morning in January I proceeded to head to the Catoctin mountains of Maryland.  I had tied a few flies to copy a nymph I had seen in one of the magazines thinking that, if it caught trout for the author it just might catch a trout or two for me.  At the time I thought the fur I was using was hare's ear;  however, later I was to discover it wasn't.  It was mink.  No big deal, it looked buggy and that's what I thought I wanted.  

When I arrived at Big Hunting Creek I put my 6 1/2' fiberglass Shakespeare Wonderod together, secured my reel in the reel seat, ran the line through the guides and tied one of my nymphs onto my tippet.  There's no question I had no idea what I was doing but I was determined to do it.  Let's face it.  If there wasn't much info on how to fish nymphs certainly there was little to no info on equipment and set-up.  I was left to my own devices:  truly the school of hard nocks.  

I knew that nymphs were to be fished along the stream bottom and, since my nymphs weren't weighted, I needed to attach a split shot to the leader about eight inches above the fly.  I had a lot of experience fishing bait on a spinning rod so I set everything up similar to what I would if I were drifting a salmon egg or a piece of corn.  Yes, you read it right:  corn.  It was a lot less expensive than salmon eggs and trout would take a kernel of corn just as well as they'd take a salmon egg.

Cast upstream, drift the nymph downstream.  Try to get a natural drift.  Repeat.  When the drift is interrupted set the hook.  It's either bottom or...  Sure enough, I caught not just one but a few hatchery rainbows my first time fishing nymphs.  Ready for the pun?  I was hooked! 

Today the hot technique - that is, the one which gets the most attention - is Euro nymphing.  Gads, it nearly pains me to call it that.  Why, you ask?  Well, even if you haven't asked I'll tell you.  

We're going to have to go back in time again, this time to the mid-1970's when I lived in the southeast part of Pennsylvania.  I was fortunate enough to be around some young fly-fishers who were way ahead of their time.  There were two or three who were really into fishing nymphs.  Back then nymphing wasn't something that was popular.  In fact, most anglers didn't seem to want to be bothered with it.  Fortunately, that wasn't the case with these young anglers.  And, it certainly wasn't the case with me. 

These young bucks were experimenting with tying nymphs to suggest the naturals as well as more effective ways to fish them..  My interest in tying more suggestive patterns wouldn't develop until later.  However, when it came to working on fishing nymphs - and, in partucular, detecting takes - this is where these anglers could only be described as incredibly innovative.  Can you imagine incorporating a sighter in the leader back in the mid-1970's?  They did it.  And it wasn't long until I was introduced to it and started fishing with long (for the times) leaders and with sighters, too!  

Way back when we had no knowledge of the term "sighter."  In fact, this would remain the case for years.  When I wrote an article which appeared in FLY FISHERMAN magazine titled "Tiny Nymph Tactics"in 2001 I introduced my leader and called it a vari-colored leader.  It truly was a vari-colored leader since it not only had a bright yellow sighter but also a butt section of fluorescent clear blue Stren mono.  

Years later I engaged in a conversation with a fellow angler who happened to be from Poland.  Imagine my surprise when he informed me this technique for nymphing was developed there sometime in the mid-1970's.  I've said numerous times that if there had been some promotion/publicity back then we could just as well have called it PA nymphing.  Unfortunately, I don't receive much positive feedback when I say that.  Oh, well... 

Some people seem to get a bit upset when I state I'm not sure how to define Euro nymphing.  After all, there's Czech, Polish, French, Spanish, and who knows whatever else nymphing.  Oh, and let's not forget Pennsylvania.   I've finally settled on anything that would fall within the Fips-mouche rules for competitive fly fishing.  What seems to bother some folks is that my definition eliminates the mono rig, placing flies closer than the minimum allowed by the competition rules and...you got it...adding weight to the leader.

So, now it should be as clear as an early spring limestone-influenced stream flow - not murky, just a bit milky - why I don't like to use the term "Euro nymphing."  I could call it high-sticking, tight-lining or contact nymphing;  however, I can relate all three of those to fishing with an indicator, as well.  Yeah, sometimes I'm just downright difficult.  So, here I get to introduce to the fly fishing fraternity a new term.  Drum roll, please!  Here goes!!  I like to call it SIGHTER NYMPHING!

Today, it seems to me that many anglers come to sighter nymphing from indicator nymphing.  Logical thinking on my part since nymphing with indicators was popular a fair bit before sighter nymphing gained exposure primarily from the competitive fly fishing scene.  Obviously, this wasn't the case with me.  No such thing as indicators back when I started drifting nymphs along the stream bottom.  In fact, for many years I scoffed at using indicators.  I came up with all sorts of reasons using an indicator was bad for drifting nymphs.  Unfortunately, I hear quite a few folks who use sighters say the same thing I said all the way into the mid-90's.  That was about the time that, for me, something changed. 

In the mid-90's I got the hair brained idea that, after more than 20 years of doing it, I wanted to write a book on nymphing.  I mentioned this to one of my peers while we were attending a fly fishing show in New Jersey.  He proceeded to tell me that a prominent publisher of fly fishing books was at the show and even pointed him out to me.  I walked up to the publisher, introduced myself, explained what I would Iike to do and when the conversation ended I walked away shaking my head.  Did I just get the green light to go with this project?  It was then that reality hit me across the side of my head with it's open hand.  I didn't know nearly as much about this thing called nymph fishing to write about it with confidence based on experience.  Besides, I'd never yet fished a nymph with an indicator!!  I realized I had much to learn before I could speak with authority.  And learn I did.  In fact, I'm still learning! 

As many of my fellow fly fishers do, I have come to a point where I have chosen my equipment preferences - rods, reels, lines, leaders and flies - for specific reasons.  My approach to the nymphing game may be quite different than that of other well seasoned anglers.  And when it comes to tactics I have settled on those which I believe provide me the best advantage on the water.  I've been at this game long enough to recognize that I am required to compromise frequently to achieve a desired effect.  It's important for me to be able to justify to others, and especially myself, why I use what I use and why I do what I do.  I also recognize that improvement requires a dynamic approach.  

As I stated earlier this is all about Dave Rothrock's approach to nymphing for trout.  With the introduction now out of the way there will be four more segments to complete the series:   1) My choices for rods and reels and why;  2) My choices for lines and leaders and why;  3) My choices for flies and accessories and why, and 4) Strategies and tactics.

Hopefully, those who follow this series will learn a little about nymphing but, more importantly, I want to stimulate thought about this most fascinating facet of fly fishing.  It's how we move to improve!


Newer Posts Older Posts Home

POPULAR POSTS

  • ANOTHER MAYFLY EASY ON THE EYES: SLATE DRAKES ARE BIG!!
  • DRY FLY LEADERS FOR TROUT: THE LONG AND SHORT OF IT...AND WHAT'S IN BETWEEN
  • DAVE ROTHROCK'S APPROACH TO FISHING NYMPHS PART 2: RODS AND REELS
  • DAVE ROTHROCK'S APPROACH TO FISHING NYMPHS PART 3: LINES AND LEADERS
  • (no title)
  • (no title)
  • STOCKED OR WILD: THAT IS A QUESTION
  • Of Itchy Fingers, High Water ... And Trout!
  • (no title)
  • (no title)

Categories

  • brook trout 1
  • brookies 1
  • brown trout 1
  • hatchery trout 1
  • Iso 1
  • Isonychia 1
  • mayfly 2
  • sipping trout 1
  • Slate Drake 1
  • slow water 1
  • stocked trout 1

Search This Blog

Powered by Blogger.

Blog Archive

  • ►  2023 (2)
    • ►  March (1)
    • ►  January (1)
  • ▼  2022 (6)
    • ▼  December (1)
      •                                                   ...
    • ►  August (1)
      •  DAVE ROTHROCK'S APPROACH TO FISHING NYMPHS PART 5...
    • ►  March (1)
      • DAVE ROTHROCK'S APPROACH TO FISHING NYMPHS, PART 4...
    • ►  February (1)
      • DAVE ROTHROCK'S APPROACH TO FISHING NYMPHS PART 3:...
    • ►  January (2)
      • DAVE ROTHROCK'S APPROACH TO FISHING NYMPHS PART 2:...
      • DAVE ROTHROCK'S APPROACH TO FISHING NYMPHS PART 1...
  • ►  2021 (8)
    • ►  December (1)
    • ►  September (1)
    • ►  August (1)
    • ►  July (2)
    • ►  June (2)
    • ►  May (1)
  • Home
  • Home
  • About Me

Featured Post

Popular Posts

  • ANOTHER MAYFLY EASY ON THE EYES: SLATE DRAKES ARE BIG!!
  • DRY FLY LEADERS FOR TROUT: THE LONG AND SHORT OF IT...AND WHAT'S IN BETWEEN
  • DAVE ROTHROCK'S APPROACH TO FISHING NYMPHS PART 3: LINES AND LEADERS
  • DAVE ROTHROCK'S APPROACH TO FISHING NYMPHS PART 2: RODS AND REELS

Trending Articles

  • ANOTHER MAYFLY EASY ON THE EYES: SLATE DRAKES ARE BIG!!
  • DRY FLY LEADERS FOR TROUT: THE LONG AND SHORT OF IT...AND WHAT'S IN BETWEEN
  • DAVE ROTHROCK'S APPROACH TO FISHING NYMPHS PART 2: RODS AND REELS
  • DAVE ROTHROCK'S APPROACH TO FISHING NYMPHS PART 3: LINES AND LEADERS

Designed by OddThemes | Distributed By Gooyaabi